
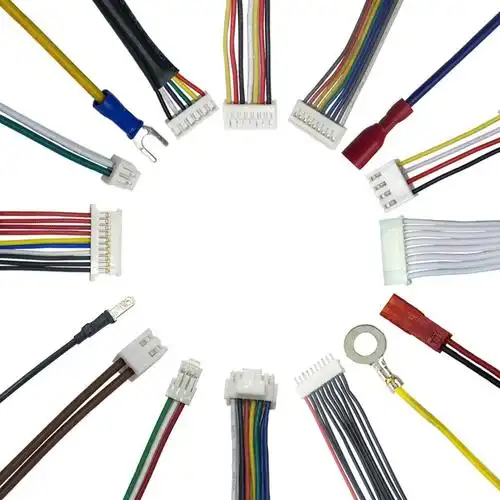
Industrial Cable Assemblies-Industrial Cable Assemblies factory
Installing industrial cables in tight spaces—such as between machinery, within control cabinets, or under floorboards—poses unique challenges that demand precision, proper tooling, and safety awareness. Unlike open areas, confined spaces limit maneuverability, increase the risk of cable damage, and require strategic planning to ensure compliance with industry standards. This guide provides step-by-step instructions and expert tips to streamline the process, minimize errors, and maintain long-term cable performance.
Before beginning any work, thorough preparation is critical to avoid costly rework and safety hazards. Start by conducting a detailed site assessment: measure the dimensions of the tight space (height, width, depth) and map out potential obstacles like pipes, wires, or sharp edges. Use a digital caliper or laser distance meter for precise measurements—even a 10mm miscalculation can lead to cable kinking or insufficient clearance.
Next, verify the cable specifications against the application requirements. Industrial cables vary in flexibility, insulation material, and diameter; for tight spaces, choose low-smoke zero-halogen (LSZH) cables with a flexible stranding (e.g., 19-strand or 37-strand conductors) to bend easily without breaking. Check the cable’s minimum bend radius—exceeding this limit can damage internal conductors and compromise signal or power transmission.
Finally, gather all necessary safety equipment:绝缘手套 (insulated gloves), safety goggles, a dust mask (for spaces with debris), and a portable gas detector if the area is enclosed (to check for hazardous fumes). Ensure the space is well-ventilated and illuminated with a rechargeable LED work light—avoid using extension cords that add clutter to the already confined area.
The right tools are make-or-break for tight-space cable installation. Avoid bulky equipment; instead, opt for compact, ergonomic tools designed for confined access:
Use a pencil or marker to outline the cable path on nearby surfaces. Prioritize routes that avoid sharp edges (use cable grommets to protect insulation) and heat sources (maintain at least 15cm clearance from motors or heaters). If the path requires passing through walls or floors, drill holes with a right-angle drill attachment—this tool can reach spaces where a standard drill cannot.
Cut the cable to length before entering the tight space—add an extra 30cm to account for any unexpected bends. Strip the insulation from both ends (follow the manufacturer’s guidelines for strip length) and attach cable lugs or connectors if needed. Wrap the stripped ends with electrical tape to prevent fraying during installation.
Feed the cable into the tight space using the fish tape: attach the tape’s tip to the cable’s end with electrical tape, then gently push or pull the tape through the path. For particularly narrow gaps (less than 10cm), have a second technician guide the cable from the opposite end to avoid snags. Once the cable is in place, use cable ties or mounting clips to secure it—space clips every 20-30cm to prevent sagging, but avoid over-tightening (this can compress the insulation).
After installation, conduct a continuity test using a multimeter to ensure no conductors are broken. Check the insulation resistance with a megohmmeter—values should meet industry standards (typically ≥100MΩ for low-voltage cables). Finally, trim any excess cable and recheck all connections to ensure they are tight and properly insulated.
Installing industrial cables in confined areas doesn’t have to be a hassle—with the right approach and quality products, you can ensure efficiency and reliability. FRS Brand Factory specializes in manufacturing flexible, high-performance industrial cables tailored for tight spaces, paired with a full line of compact installation tools. Our LSZH flexible cables feature superior bend resistance and temperature tolerance, while our ergonomic tool kits make even the most challenging installations straightforward. Trust FRS to deliver solutions that save time, reduce waste, and keep your operations running smoothly. Contact us today to learn more about our cable and tool offerings.
Our factory offers high-quality products at competitive prices
Industrial Cable Assembly Product Summary Material & Safety Utilizes premium raw materials and globally recognized components (e.g., ABB, TE Connectivity) ensuring high reliability and safety to prevent risks like fire and e.

Product OverviewQuick-Install Cable Adapters are the game-changing connectivity solution designed for professionals and DIY enthusiasts alike. Engineered to eliminate installation hassles, these adapters provide instant, tool-free conne.
Feel free to reach out to us for any inquiries or orders.