Best

Industrial Cable Assemblies factory

How to Install Industrial Cable Assemblies Correctly: A Step-by-Step ...

Installing industrial cable assemblies correctly is critical for ensuring safety, reliability, and long-term performance in demanding environments. Mistakes can lead to downtime, equipment damage, or safety hazards. Follow this step-by-step guide to get the installation right:

1. Preparation is Key: Safety & Planning

  • Review Documentation:​​ Carefully study the manufacturer’s specifications, drawings, and installation instructions specific to your cable assembly and connectors.
  • Safety First:​​ Disconnect all power sources and lock out/tag out (LOTO) equipment before starting. Wear appropriate Personal Protective Equipment (PPE) like insulated gloves and safety glasses.
  • Inspect Components:​​ Examine the cable assembly, connectors, glands, and entry points for any visible damage (cuts, kinks, crushed areas, bent pins) before installation. Do not install damaged components.
  • Plan the Route:​​ Identify the optimal cable path between devices. Consider:
    • Minimum Bend Radius: Never exceed the cable’s specified bend radius (typically a multiple of the cable diameter, e.g., 8xD).
    • Protection: Avoid sharp edges, moving parts, high heat sources, chemicals, and areas with potential abrasion. Use conduits, cable trays, or protective sleeves where necessary.
    • Strain Relief: Plan for adequate strain relief using cable glands or clamps near connection points.

2. Pre-Installation Cable Handling

  • Avoid Pulling Stress:​​ Never pull directly on the cable assembly connectors. Grip the cable jacket behind the connector using proper pulling grips or rope/sock if needed.
  • Feed Carefully:​​ Gently feed the cable along the planned route. Use cable rollers for long pulls or congested paths to minimize friction and stress. Never force the cable.
  • Manage Slack:​​ Leave sufficient service slack (loop) at both ends to facilitate easy connection/disconnection and future servicing without putting strain on the termination points. Avoid coiling excess slack tightly.

3. Cable Entry & Securing

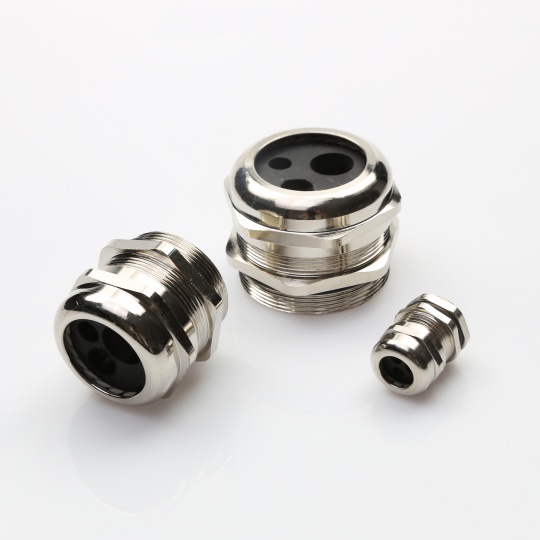
  • Use Correct Glands:​​ Select the right cable gland type and size compatible with the cable diameter and jacket material. Ensure it’s rated for the environment (IP rating, chemical resistance).
  • Terminate the Gland:​
    • Thread the gland components onto the cable before attaching the connector.
    • Pass the cable end through the equipment’s entry point.
    • Securely tighten the gland onto the equipment enclosure according to manufacturer specs. This provides IP sealing and strain relief.
  • Secure Along Route:​​ Use appropriate clips, clamps, or ties (e.g., stainless steel cable ties, velcro) at regular intervals along the route to support the cable and prevent movement or sagging. Do not over-tighten tie wraps.

4. Making Connections

  • Cleanliness:​​ Ensure connector faces and ports are clean, dry, and free of debris or oil. Use only recommended cleaning methods/solvents. Handle connectors carefully by the body, not the pins/sockets.
  • Alignment:​​ Carefully align connectors before mating. Do not force. For threaded connectors, start threads by hand to avoid cross-threading.
  • Seating:​​ Push connectors firmly and evenly together until you feel/hear a distinct click or until they are fully seated (e.g., threaded types fully screwed together).
  • Locking:​​ Engage any locking mechanisms (e.g., thumbscrews, levers, hex nuts) securely as per the connector design. For plugs into sockets on equipment, ensure the latch snaps into place.
  • Grounding:​​ Ensure proper grounding according to specifications, especially for shielded cables and sensitive electronics.
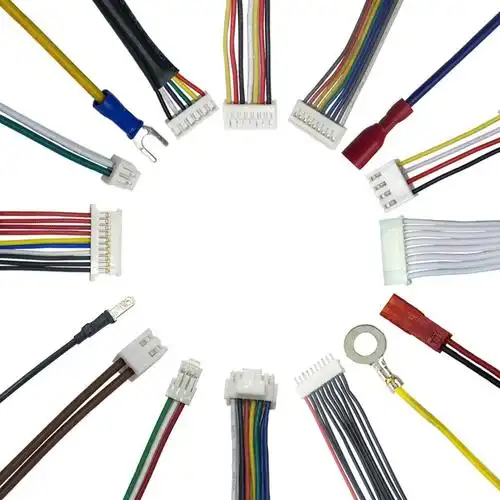
industrial cable assemblies

5. Post-Installation Checks & Testing (Crucial!)​

  • Visual Inspection:​​ Double-check all connections are secure, locked, and seated properly. Confirm strain relief is effective, bends are within radius, and the path is safe.
  • Continuity Test (If Possible):​​ Use a multimeter to verify electrical continuity through each conductor before applying power, especially for critical circuits. Check for shorts or grounds.
  • Power Application:​​ If tests are good, carefully apply power according to commissioning procedures. Start with low power/system test mode if possible. Monitor for any unusual signs (sparks, heat, noise).
  • Signal Verification:​​ For data cables, use appropriate testers to verify signal integrity if required. Test all relevant device functions.

Key Installation Practices to Remember

  • Observe Minimum Bend Radius:​​ This is paramount to protect internal conductors and shields.
  • Avoid Tension & Crushing:​​ Never pull on connectors. Use designated grips. Do not pinch cables under covers or within machinery.
  • Protect from Damage:​​ Shield cables from abrasion, impact, chemicals, and excessive heat/cold.
  • Use Correct Hardware:​​ Match glands, clamps, and connectors exactly to the cable type and application requirements.
  • Tighten Securely:​​ Ensure all threaded connections (glands, connector shells) are tightened sufficiently for sealing and holding power, but avoid damaging threads.
  • Document:​​ Update drawings to reflect the as-installed configuration.

Example Scenario:​​ Installing a Power Cable to a Motor

  1. LOTO the motor and associated control panel.
  2. Inspect the power cable assembly visually. Confirm gland size fits cable diameter.
  3. Thread the cable gland components onto the power cable.
  4. Route the cable safely from the panel to the motor junction box using clips/tray, observing bend radius. Leave service loops at both ends.
  5. Pull the cable end into the motor junction box, secure with the gland (providing sealing/strain relief).
  6. Pull the cable end into the control panel, secure with its gland.
  7. Strip cable ends per terminal requirements. Connect conductors securely to terminals (Line 1, Line 2, Line 3, Ground) in both the motor box and the panel. Torque terminals to spec.
  8. Verify gland sealing and strain relief is effective at both ends.
  9. Double-check all connections are tight and correct.
  10. Perform continuity check if possible.
  11. Close enclosures securely.
  12. Remove LOTO, power up carefully, and monitor initial operation.

By diligently following these steps and best practices, you ensure your industrial cable assemblies are installed correctly, maximizing safety, minimizing failures, and guaranteeing the reliable operation your critical equipment demands. Always prioritize the manufacturer’s specific instructions above generic guidelines.

More Industrial Cable Assemblies related Products

Heavy machinery cable assemblies

Heavy machinery cable assemblies are robust, high-performance connectivity solutions engineered to meet the demanding requirements of industrial and heavy-duty applications. Designed for durability, reliability, and optimal performance in.

More information
INDUSTRIAL CABLE ASSEMBLIES PRODUCTS ONE

Industrial Cable Assembly Product Summary‌ ‌Material & Safety‌ Utilizes premium raw materials and globally recognized components (e.g., ABB, TE Connectivity)‌ ensuring high reliability and safety to prevent risks like fire and e.

More information
Quick-Install Cable Adapters

‌Product Overview‌Quick-Install Cable Adapters are the game-changing connectivity solution designed for professionals and DIY enthusiasts alike. Engineered to eliminate installation hassles, these adapters provide instant, tool-free conne.

More information
Shielded cable core
Shielded cable core

In today’s technology-driven world, maintaining uninterrupted signal integrity is critical for industrial, commercial, and residential applications. The ‌Shielded Cable Core‌ is engineered to deliver superior electromagnetic interference .

More information
Industrial control cable module components

Meta Description: Discover high-performance industrial control cable module components designed for seamless automation, harsh environments, and superior connectivity. Explore specs, certifications, and applications. H2: Industrial Con.

More information
High-temperature resistant cable accessories

Ensure reliable power transmission and long-lasting performance in the harshest conditions with our ​High-Temperature Resistant Cable Accessories. Engineered to withstand extreme heat, these premium-grade accessories are designed to prote.

More information
Corrosion-Resistant Cable Connectors | Durable & Weatherproof Sol...

Corrosion-Resistant Cable Connectors: Reliable Connectivity for Harsh Environments Ensure uninterrupted performance in the toughest conditions with our ​corrosion-resistant cable connectors. Designed for durability and longevity, these.

More information
High-load cable terminations

When it comes to electrical systems operating under extreme mechanical and electrical stress, ​high-load cable terminations are critical components that ensure seamless power transmission, safety, and system longevity. Engineered to .

More information
Protective cable kit

Meta Description: Discover the ultimate Protective Cable Kit designed to safeguard your cables from wear, tangles, and damage. Perfect for home, office, and industrial use. Shop now for long-lasting cable management! ​Protecti.

More information
Industrial cable components

Industrial cable components are the backbone of reliable and efficient connectivity in industrial automation, robotics, and machinery. Engineered to withstand harsh environments while ensuring seamless data transmission and power delivery.

More information